How to Create Folders in Gmail using Android App — Separating inbox based on certain type or topic helps us to access Gmail efficiently. We don’t need to scroll and read the emails one by one to find the email we need. To facilitate the problem, Google is already provided a feature named Labels. It allows us to see certain emails in the form of a folder. However, not all people know about this Labels feature. To know the detailed way in using the feature, let me show you the steps in the next section.
How to Create Folders in Gmail using Android App
Here are the steps of How to Create Folders in Gmail using Android App. I remind you that this tutorial will work well on Gmail for Android. If your device is iOS, you probably will find some different steps.
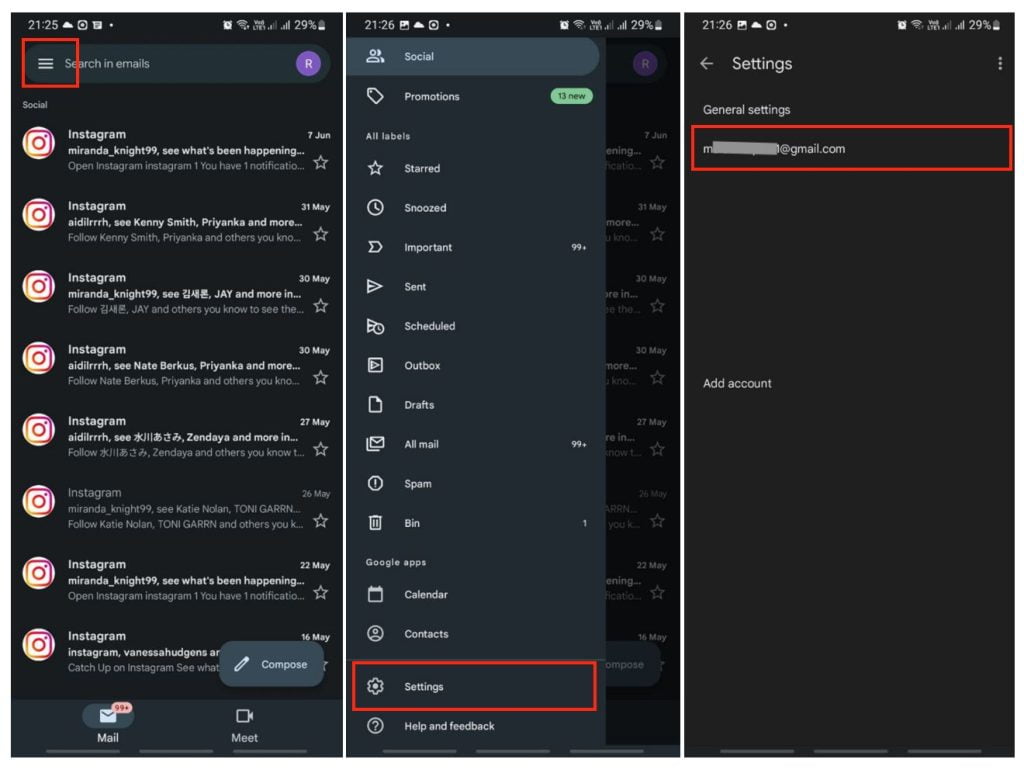
- Open the Gmail app on your Android smartphone. If you haven’t installed the app yet, please go to Play Store to download it first.
- After the app is opened, log in with your credential.
- Then, tap the three-line button on the top-left corner.
- Next, scroll down the menu to find Settings. Once you see it, tap it.
- Select your email.
- After that, select Manage labels.
- There, you can delete, change or add a label.

Well, this is the last section of the tutorial. I hope you find this tutorial useful. Let your buddies know about this trick. So, they can create a folder in Gmail from their Android smartphone.
Let me know in the comment section below if you found any difficulties in following the steps, or if you have any questions that are related to the topic that is being discussed, I will be happy to answer and help you out.
Thanks a lot for visiting nimblehand.com. Have an extra-special, amazingly fun, undeniably awesome, super fantastic day, and see you in the next article. Bye 😀


