Have you ever felt annoyed, difficult, and too much effort to switch between apps while working with your MacBook? If you have, I recommend you to use the MacBook feature that is called split view. This feature helps you to do your task more efficiently and effortlessly as you don’t need to switch between apps many times.
Quick-Step
Make sure 2 windows of the screens are not in full screen more > Point the Green button > Select Tile window to the left/right > Select another screen to be split with
Easy Steps in Splitting Screens in MacOS
If you don’t know yet how to use split view, here are the steps about How to Use Split View in MacOs Screen:
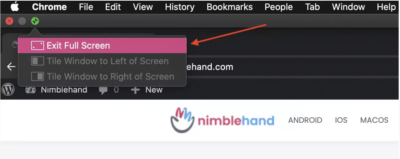
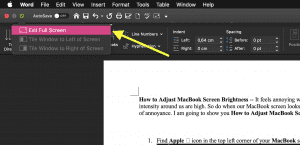
1. Make sure the two windows or apps that will be set in split view are not in full-screen mode. If it is in the full-screen mode, end its mode by pointing to the green dot on the left top corner of the screen 2 times simultaneously then choose Exit Full Screen.(The picture below is the first window that is going to be set in split view)
(The picture below is the second window that is going to be in split view)
2. After that, point to the green dot on the left corner of the first window 2 times simultaneously to show to choices of the split view. The choices are (1) Tile Window to Let of Screen and (2) Tile Window to Right of Screen. If you want to make the current window be placed on the left side of the split view choose 1st choice, but if you want to place the current window to be placed in the right side, choose the 2nd choice.
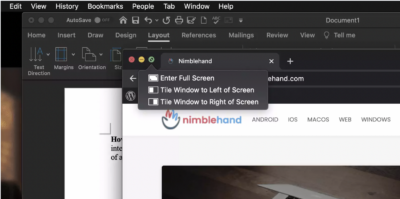
3. Let’s say, I choose the 1st choice. It is Tile Window to Left of Screen. So, I click it.
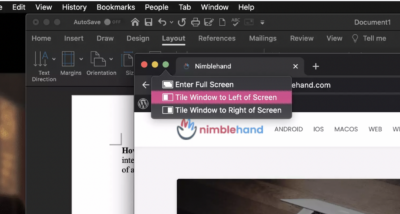
4. After it’s clicked, the view will be like this.
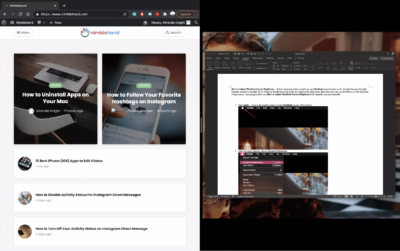
5. The picture above is the unfinished look of the split view. The first window is on the left side of the screen, and on the right side is the look when I haven’t selected which app to include in the split view. But there is a window that’s available or ready to be chosen.
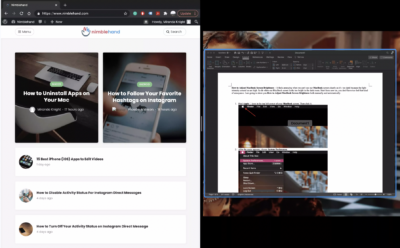
6. Then, point to the available window on the right side. When it’s being pointed, there will be a blue frame appears around the window. Now, click it.
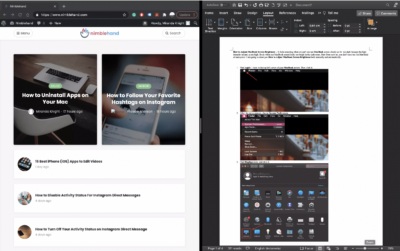
7. Here is the look of a successful split screen.
Hope it’s helpful for you and don’t forget to stay tuned for our next articles.

