Instagram story is a feature on Instagram that allows us to post vertical photos or videos in 15 seconds of each story and will disappear after 24 hours. This feature is cool. We can post any photos or videos that we want to post without making them appear on our feed.
Our followers can also react and comment on our story but people will not be able to know it. Only we, the owner of the story will know it. Then, How to Save, Find, and Edit Story Drafts on Instagram? Alright, I am going to explain it in the next paragraph:
Here are the steps of How to Save, Find, and Edit Story Drafts on Instagram that you can follow:
Saving a story to draft:
- First, launch the Instagram app on your smartphone.
- Make sure that you already logged in to your Instagram account. If you haven’t, please log in first.
- Now, swipe right or tap the story handle of yours on the top left.

- Choose an image or video by swiping up the screen or tapping the square picture icon there.

- After you chose an image or video, edit it using filters, stickers, text, and many more.
- Then, tap the x button on the top-left corner of the screen.
- You will a confirmation pop-up there, tap Save Draft.
Finding a story draft:
- After you launch Instagram on your smartphone, tap your story handle or swipe right on the screen.
- Then, swipe up the screen.
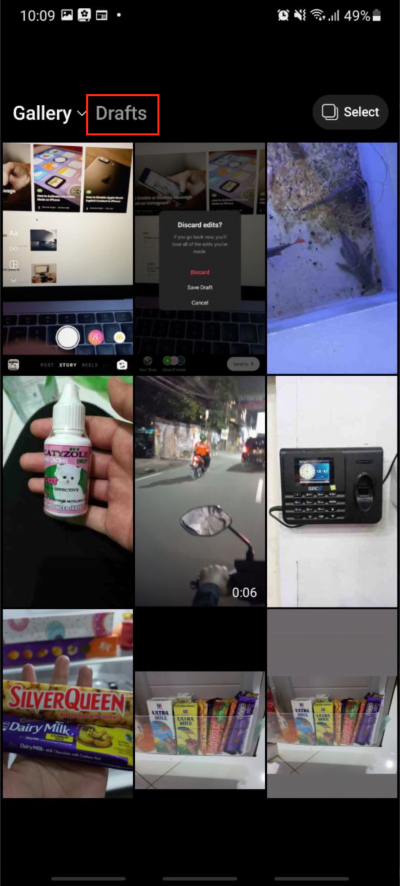
- Tap the Drafts menu on the right side of Gallery.

- Well, there you are. You can find the story that is previously drafted by you.
Editing a story from the draft:
- Follow steps 1-4 of Finding a story draft.
- Then, select the story that you want to edit.
- After that, you can continue editing your story. You can add text, stickers, draw something, and many more.
Thanks a lot for visiting nimblehand.com. As always, stay safe, stay healthy and see you in the next tutorial. Bye 😀


