Windows Defender, which is built into Windows 10, scans your files for malware in the background. You can add an exclusion to Windows Defender to improve performance for tasks like compiling code or running virtual machines.
Exclusions can also be useful if Windows Defender incorrectly detects legitimate files as malware.
Be cautious about what you exclude. Windows Defender will not scan the files and directories you have excluded for malware. For example, you wouldn’t want to exclude everything in your Downloads folder!
How to Create and Configure a Windows Defender Exception or Exclusion
Unless we manually install another antivirus on Windows 10, Windows Defender will be in charge of our security. And, while Windows Defender protects us well by default, there are some tricks for Windows Defender that allow us to improve our security.
To begin, we must launch Windows Security and make some changes to the settings. Enter “Windows Security” into the Start menu. Then, choose the “Windows Security” application.
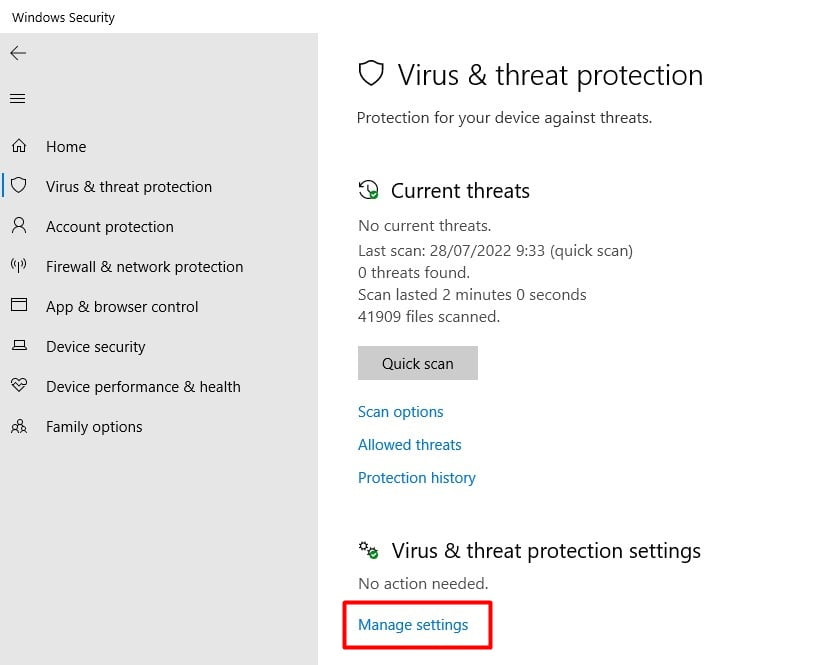
Navigate to “Virus & Threat Protection” in Windows Security. After that, select “Manage Settings.“

Scroll down to the bottom of the page in “Virus & Threat Protection Settings” and click “Add or Remove Exclusions.”

You can exclude files from Windows Defender scans by adding or removing them from the Exclusions page. Click the “Add An Exclusion” button beside the large plus symbol (+) to add an exclusion.

A small menu will appear, allowing you to exclude files, folders, file types, or processes.

What you choose is determined by the type of exclusion you seek. Here is what each option does.
- If you choose this option, a box will appear that allows you to browse your computer for a single file that will be excluded from future scans. Choose the file you want to open, then click “Open.”
- Folder: Similar to the File option, this allows you to search your computer for a specific folder to exclude from scans. The contents and subfolders of the folder will also be excluded.
- Type of file: A box will appear asking you to enter a file extension (for example, “.MID”) representing the file type you want to exclude. Future scans will not include any files of that type. This is risky because you may unintentionally exclude a large class of potentially dangerous files, such as PDF or DOC files.
- Process: A pop-up window will appear asking you to enter the name of a process (a running program, such as “explorer.exe”) to exclude from scans. If a program you know is safe continues to be flagged by Defender, enter it here.
Choose one of these options and make the necessary choices in the pop-up dialog that appears.

When you add an exclusion, it will be listed on the Exclusions page.

How to Remove of the Exclusion
If we want to remove the exclusion later, we can do so from the list by selecting the corresponding entry and clicking the “Remove” button.
When you’re finished, close Windows Security to save your settings. The items you added to the exclusions list will no longer cause problems the next time your system runs a Defender scan.


