Apple’s iCloud storage service is a popular cloud-based solution that provides users of Apple devices with the ability to upload and sync data from their devices to the cloud, then share it in real-time with any other devices they happen to own.
You may use iCloud for Windows to access and upload photos stored in the cloud. Although Apple created iCloud specifically for its users, iPhone users can use a Windows PC to install iCloud and then use the iCloud drive for Windows computers. Photos, documents, and bookmarks on your PC are instantly updated on your Apple devices when you use iCloud for Windows.
Since Apple has published multiple versions of iCloud for Windows, this article will discuss the same issue of how iCloud may be installed on a Windows computer.
Please note that I’m using Windows 10 here, but it should not be different to do on Windows 11.
Apple’s iCloud service is also available for Windows PC users, which means you may use iCloud on Windows to control or manage your iPhone, iPad, and other Apple device data.
Before we start, make sure your Apple ID is signed in and that iCloud is enabled on your iPhone, iPad, iPod touch, or Mac. If you’re unsure how to install iCloud on Windows, it’s possible you’ve never heard of it. We will help you as well by providing step-by-step guidance, which you are suggested to follow in the same way.
1. Download iCloud for Windows on your PC and go to the Microsoft Store.
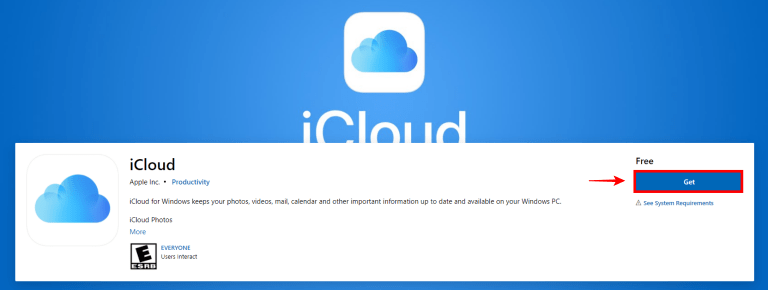
Note: If it doesn’t install immediately, open iCloud Setup in File Explorer.
2. Restart your Windows computer.
3. Ensure that iCloud for Windows is running. If it doesn’t open instantly, go to Start, select Apps or Programs, and then select iCloud for Windows from the list.
4. Sign in to iCloud by entering your Apple ID.
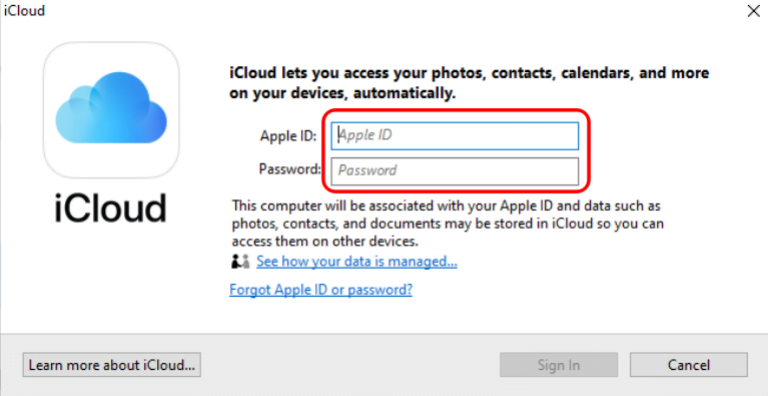
5. Choose which features and content you wish to have on all of your devices.
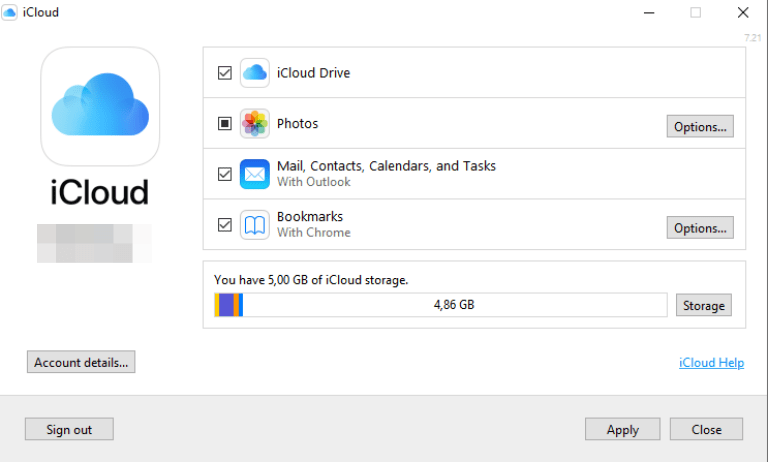
6. Click Apply to finish the setup setting.
Use File Explorer to View iCloud Drive Files
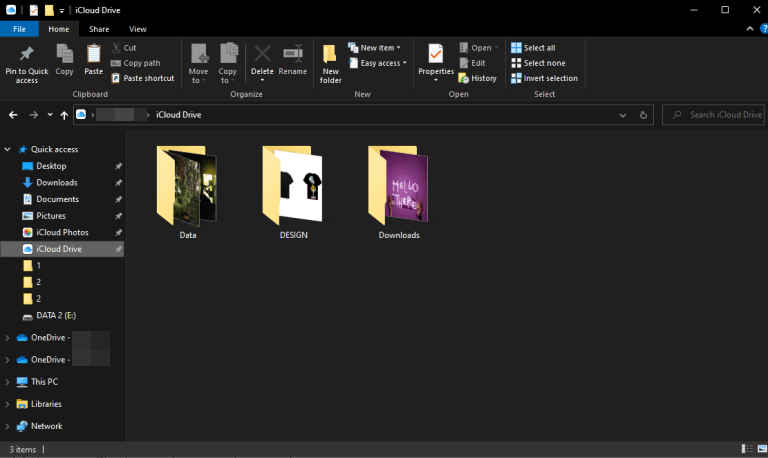
After installing iCloud for Windows by following the steps above. Now open a new File Explorer window and go to the Quick Access navigation menu and select iCloud Drive. Then you should be able to view, edit, download, or delete any files in your iCloud Drive account in the same way you would with other files on your computer. When you disable iCloud Drive in the iCloud for Windows software, it will prompt you to erase iCloud files from your computer. Nothing will be removed from your iCloud account as a result of this.
Download and share your photos
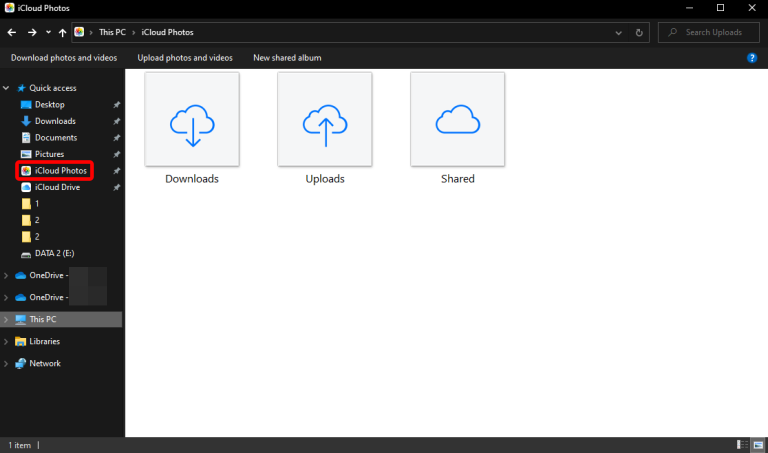
iCloud Photos saves all of your photos and videos to the cloud, making them accessible across all of your devices. When you enable Photos in iCloud for Windows, it generates an iCloud Photos folder in File Explorer. New photos and videos added to the iCloud Photos folder on your PC are automatically uploaded to the Photos app on your iPhone, iPad, iPod touch, and Mac, as well as to iCloud.com. iCloud Images automatically download new photos and videos you take.
Your photos can also be shared. You may browse, share, and comment on photos and videos that you’ve shared with others under Shared Albums. You can also pin photos to keep them local to your device if you have the latest version of iCloud for Windows. When you unpin them, they instead upload to iCloud.
Have a nice day!


